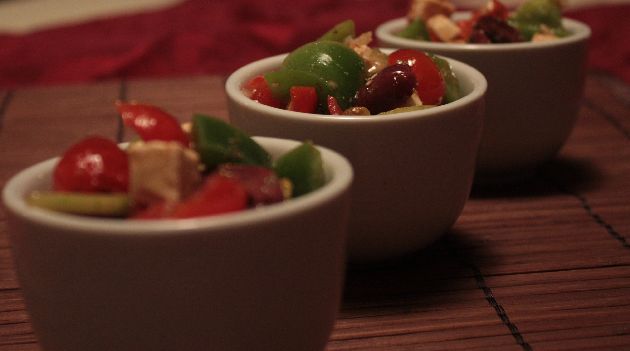
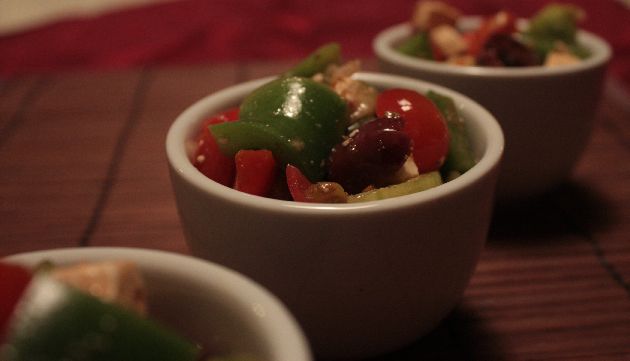
Greek Salad
Greek Salad…it’s crisp-y, crunch-y, salt-y, a bit tart and herb-y. I crave this salad all the time and make it often!
It holds up great – I’ve been known to make a huge bucket of it to bring on camping trips. The longer the veggies and cheese sit in the dressing, the more flavorful they get!
Greek Salad
6-8 servings
1 large green bell pepper, cut into bite sized pieces
4 plum tomatoes, diced
half of a large cucumber (that’s been peeled and seeded, if necessary), cut into bite sized pieces
1 cup Kalamata olives, pitted and sliced in half
4-5 oz. feta cheese, crumbled or cut into small pieces
1 tablespoon minced onion (if you like more onion or larger pieces, please do add it! I’m not much of a fan of a lot of raw onion)
Dressing:
1 tablespoon balsamic vinegar
2-1/2 tablespoons red wine vinegar
1/8 teaspoon garlic salt
2 tablespoons extra virgin olive oil
1-1/2 teaspoons oregano
1. Place bell pepper, tomato, cucumber, Kalamata olives, feta cheese and onion in a large bowl and mix gently to combine.
2. Place dressing ingredients in a small bowl and emulsify with a small fork. Pour dressing over the veggie mixture and mix gently to combine.
Oh Chocolate…Will You Be My Valentine?
Last night I brought my son Gabe into Fred Meyer and experienced the panic of last minute Valentine’s Day shopping. I think it was everyone else’s panic, really… candy, valentines, balloons and flowers exploded all over the place like a huge Valentine’s Day bomb! Oh and there was chocolate…TONS of chocolate!!
We picked up some organic strawberries in the produce section and I noticed they had strategically placed some chocolate ‘magic shell’ stuff next to the strawberries. I resisted, knowing that I had a huge bag of chocolate chips at home and could use them make chocolate dipped strawberries for my valentines at home.
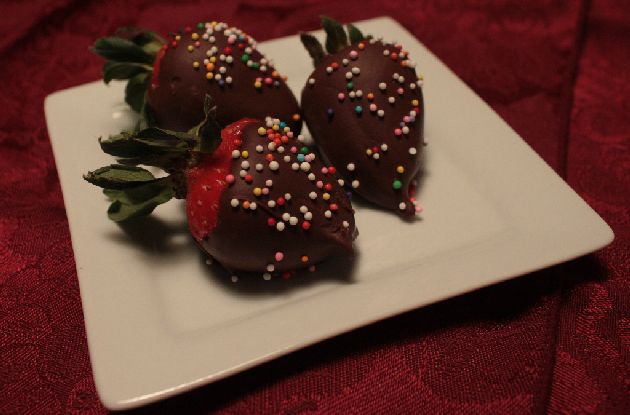
Chocolate Strawberries
Strawberries, washed and dried (Make sure they are dry because the melted chocolate won’t stick to a wet strawberry – just pat them with a paper towel)
Semi-sweet chocolate chips
Sprinkles, if you have them
Equipment: Cookie sheet lined with parchment paper
1. Place chocolate chips in a microwave-safe bowl and melt them in one-minute increments in the microwave, stirring in-between until melted smooth.
2. Dip and swirl strawberries in chocolate, making sure most of the strawberry is covered in chocolate. Place chocolate strawberry on parchment-lined cookie sheet.
3. If using sprinkles, sprinkle them on the chocolate strawberry before the chocolate hardens.
4. Let chocolate harden a bit and enjoy!
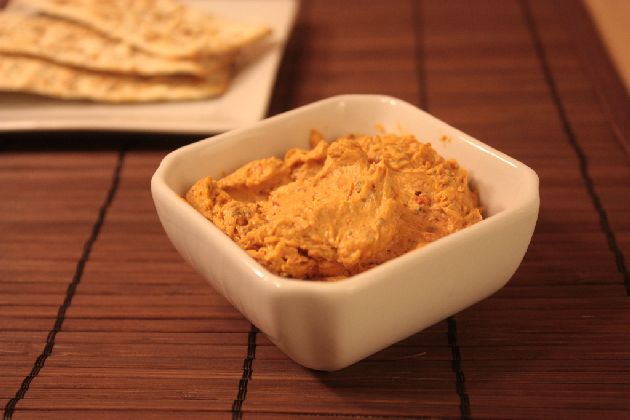
Sundried Tomato Spread
This delicious savory spread is packed with smokey sundried tomato flavor. Spread it on bagels, crackers, baguette slices, sandwiches, etc.
One of my favorite meals is to have a bunch of snacky appetizer items to choose from. This spread fits in nicely, along with various types of cold cuts or some smoked fish, cheese, crackers or baguette slices, maybe a dip with some veggies or a small salad, and some olives.
Sun-dried Tomato Spread
makes about 2.5 cups
2-8 ounce packages cream cheese
1-8 ounce jar sun-dried tomatoes in olive oil
1/2 teaspoon garlic salt
1 teaspoon dried oregano, crumbled
1 teaspoon dried thyme, crumbled
Salt to taste
Equipment needed: food processor
1. Place cream cheese in the work bowl of a food processor with the blade attachment. Add sundried tomatoes, using a fork to fish them out of the jar and letting most of the oil drain into the jar. Having some of the oil in the spread adds to the flavor, but not too much. Add garlic salt, dried oregano and thyme.
2. Pulse the items in the food processor until a rough mixture combines. Scrape the sides down and pulse again until smooth, but flecks of tomato still appear.
3. Season the spread with salt to taste, pulse to combine and place in a serving bowl.
4. If you have time, refrigerate for 2-3 hours to let the flavors combine.
Impromptu Fried Rice
Fried rice is one of the most amazingly simple dishes to make.
Believe it or not, it’s better to make fried rice out of leftover rice than freshly cooked rice (but fresh cooked is fine too). In fact, fried rice is a great way to use leftovers. Last night I tossed rice with some leftover tofu, broccoli from the night before, a few more veggies and some eggs for a delicious, quick dinner.
Fried rice doesn’t need a lot of soy sauce. When I first started making fried rice, it didn’t quite taste right so I asked my Mom about it and she told me I was putting too much soy sauce in it. Less soy sauce = much better.
You can get very authentic and start with stir frying some garlic and ginger in oil first, but it’s not necessary if you’re in a hurry.
I usually make this with whatever protein (tofu, chicken, etc.) and veggies (any fresh or leftover, or frozen corn, peas, shelled edamame, etc.) I have on hand. The addition of toasted sesame oil adds a really nice flavor to the rice and I highly recommend adding it if you have it!
Fried Rice
4-6 servings
2 eggs
1 teaspoon vegetable oil
2 cloves garlic, peeled and smashed with the flat side of a knife (optional)
4 slices fresh ginger (optional)
1 tablespoon vegetable oil
1/2 tablespoon toasted sesame oil (optional)
1 cup vegetables, can be any combination of fresh or leftover, diced
4 cups cold cooked rice
1 cup tofu or cooked leftover meat
2 teaspoons soy sauce
1-2 chopped green onion
Salt to taste
1. Combine and lightly beat eggs together in a bowl.
2. Heat 1 teaspoon vegetable oil in wok or frying pan over medium high heat. Add eggs when hot and scramble in pan until done. Remove from pan and reserve.
3. Heat remaining oils in a wok or frying pan. If using, add garlic and ginger and stir fry for 4 minutes to infuse the oil with flavor. Remove garlic and ginger from the hot oil.
4. If using, add fresh vegetables to the oil and stir fry for a couple of minutes.
5. Add rice to the vegetables/oil and stir to break up chunks. Stir fry for a few minutes, then add the frozen vegetables if using.
6. Add the tofu or meat, and the soy sauce to the rice. Stir fry until heated through.
7. Add salt to taste, if using, and sprinkle with chopped green onion before serving.
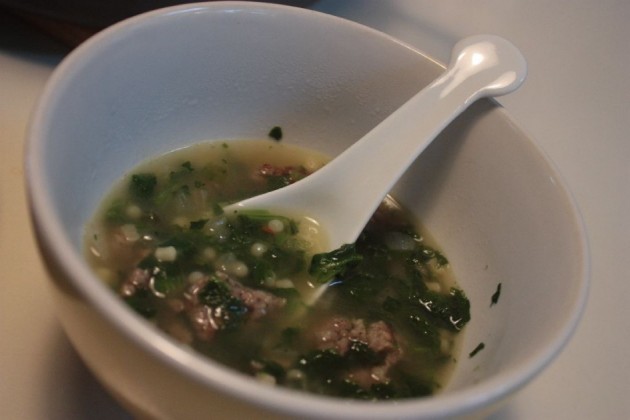
Sausage and Spinach Soup aka Meatball Soup
The chill of fall is in the air and it’s the perfect time of year to cozy up with a piping hot bowl of delicious soup. This is a hearty soup; the perfect dinner to make on a weeknight. Super quick and easy.
At home we call this Meatball Soup but it doesn’t really have meatballs in it. What it does have is fresh pork sausage fried with onions and then it’s combined with stock, pasta and spinach. I started making this because my kids loved the canned Italian wedding soup. I was looking for a cheaper and more plentiful version of it to make at home – one can of soup looks very small when you’re trying to feed a family of hungry boys 🙂
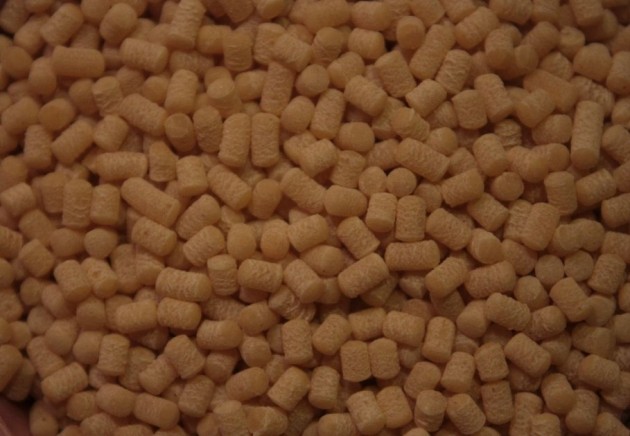
The pasta I use is called Acini di Pepe by Ronzoni. They are very tiny pieces of pasta and it cooks into little pasta balls. It looks like this before it’s cooked:
The tiny pieces of pasta actually look quite large in this photo!
In Portland, you can find this pasta at Freddie’s or Winco. If you can’t find it, any small pasta will do. I serve the soup with bread (the boys love to dip bread into the soup and eat it) and fruit or salad for a fast weeknight dinner.
Sausage and Spinach Soup
serves 4 hungry people plus plenty of leftovers for the next day (it tastes even better!)
adapted from the recipe on the back of Ronzoni’s Acini di Pepe box
1/2 pound bulk sausage
1/2 cup chopped onion
1 tablespoon olive oil, if needed
2-32 oz. cartons of chicken broth
1 cup Acini di Pepe pasta (or any small pasta)
10-12 oz. frozen chopped spinach
1. In a large pot, cook the sausage over medium high heat, breaking it up into small pieces. When browned and cooked, lift the sausage out of the pot.
2. Add the chopped onion to the pot and cook for 5-10 minutes until soft. Add the olive oil to the pot if there’s not enough oil from the sausage in the pot to fry the onions.
3. Add the chicken broth and bring to a boil.
4. Once boiling, add the pasta to the broth and cook for 10 minutes until the pasta is done. If you used larger sized pasta you may have to cook for a little longer.
5. Add the frozen chopped spinach to the soup along with the reserved sausage.
6. Bring soup back to a simmer and serve.
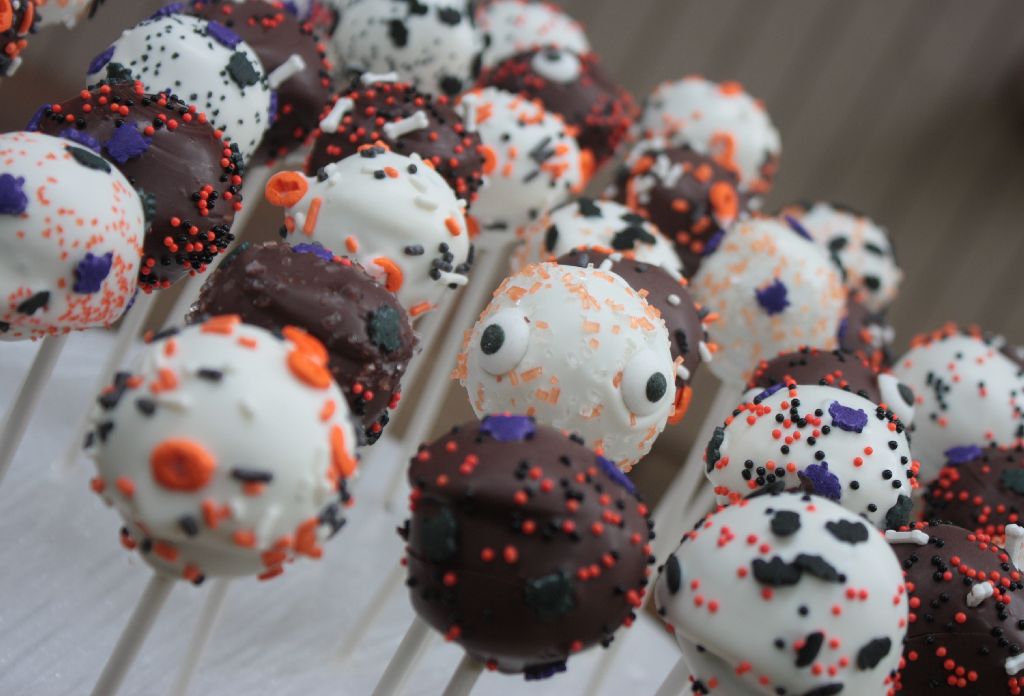
Spooky Cake Pops
Earlier this month I saw a picture of The Flourishing Foodie’s adorable Reddit cake pops on Tastespotting. How cute! I thought these would be a perfect treat for Gabe’s bake sale at his school‘s Halloween party.
Does anyone not know what a cake pop is? For those rare folks who may have just arrived back home from an extended vacation away from food blogs and Starbucks, let me enlighten you…. A cake pop is a ball of sweet deliciousness on a stick: crumbled cake, mixed with frosting and then coated in chocolate, white chocolate, candy coating or fondant. And that’s not all; the decoration options are endless with what you can affix to the coating: sprinkles, candy, frosting, more fondant, etc.
I also had a potluck at work the week before the party so I thought I’d make my coworkers the guinea pigs, ahem, I mean taste testers for the cake pops before the bake sale. This is a time consuming recipe, but the results are really worth it.
My weekdays are pretty busy with work and kids, so this took a bit of planning. It took me 3 evenings to make the cake pops. Evening 1 I baked the cake and crumbled it and mixed the frosting in it and put it in the fridge. On evening 2 I shaped the mixture into balls and put them back in the fridge. And finally the glamorous and fun part…on evening 3 I dipped them in chocolate and decorated them with sprinkles. Of course you can do it all in one go, but then it probably would’ve been an really late night for me.
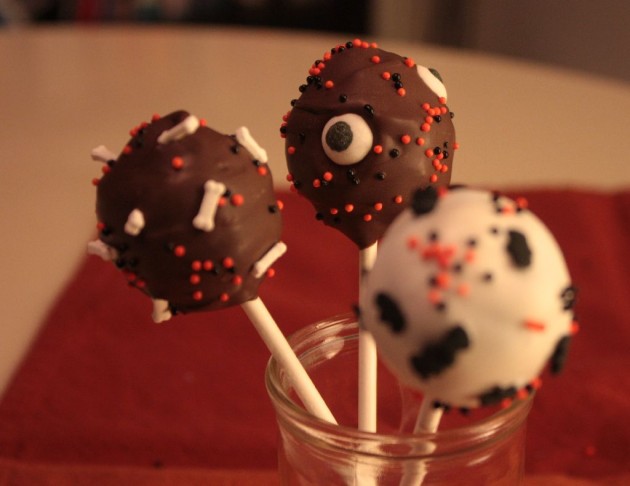
For decorations, I used an assortment of sprinkles. Halloween is one of my favorite holidays and I have a ton of Halloween sprinkles: Bats, spiders, bones, eyeballs and pumpkins.
Before I started, I did some research on the web. Much of what I learned is from these sites:
cakepoprecipes.org shared an idea about dipping the stick in melted candy coating first before inserting it into the cake pop. It helps the cake pop stay on the stick. More on this later.
Bake at 350 made some lovely pumpkin cake balls; how festive!
And of course, Bakerella has some amazing decoration ideas.
Some things I learned while making cake pops:
There will be some cake pops that want to fall off the sticks when you dip them; it’s ok. Have a plate with parchment on it close by and you can let them fall onto the parchment and you can serve them as cake balls instead. No one will know.
Keeping the cake mixture cold helps the cake pops stay on the sticks. But not too cold. The candy coating on some of the cake pops I made cracked – these were the first ones that came out of the fridge. If you notice the first ones cracking, wait a few minutes until they warm up a tiny bit and then start dipping them again.
If you use a cake mix, do not use one that has chocolate chips in it or if you do, use less frosting. I unwittingly used one with chocolate chips and the full container of frosting and the mixture was a little wet and a larger number of the cake pops fell off the sticks when I was coating them.
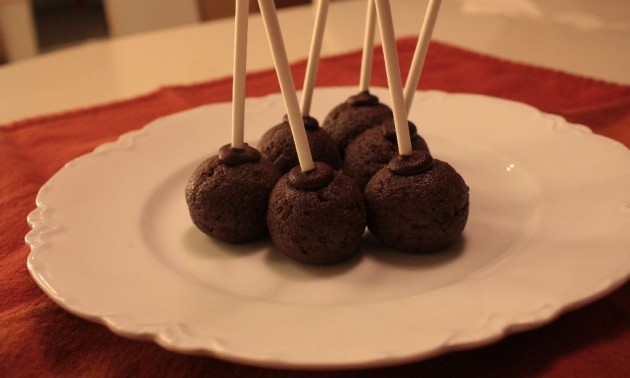
When you shape the cake pops, dip the stick into some of the candy melts you are using first before inserting the stick in the cake pop, so it looks like this:
This will help the cake mixture stay attached to the stick. If you find that many of the cake pops are falling off the sticks, your mixture is probably too moist, but not to worry. Before you coat the cake pops, use your fingers to mold some of the cake mixture from the pop around the little blob of candy coating around the stick and then coat.
The chocolate and white candy melts have differing consistencies. When melted, the white candy melts are very runny and coat the pops very easily. The chocolate melts are a lot stiffer. It still works fine but I had to spoon it over the pops to cover them completely.
If you make these, your friends and family will be so impressed. Trust me, I know!
Spooky Cake Pops
makes about 50-60 pops
1 box cake mix (see notes above)
1 container frosting (I used Cream Cheese flavor)
About 3 bags candy melts (I made half with dark chocolate and half with white chocolate)
Assorted sprinkles
Equipment needed:
9×13 baking pan
Lollipop sticks (I found these at the local craft store)
Parchment paper
Rimmed baking pan
A block of styrofoam to put the cake pops in (I found mine in the floral section of the craft store. I covered it with plastic wrap as the foam block shed small bits of foam.)
Plastic wrap
1. Bake the cake in a 9×13 pan. Cool and crumble into a large bowl. Add frosting and mix. Refrigerate until cold.
2. Prepare your workspace to shape the cake balls. Line a rimmed baking sheet with a piece of parchment paper. Take out the lollipop sticks and put them in a container that will make them easy to grab.
3. Melt about a cup of the chocolate/candy melts in a bowl. Take the cake mixture out of the fridge and form into slightly less than walnut-sized balls. Dip the tip of a lollipop stick (about 1/2″) in the melted chocolate/candy melts and insert the stick about 3/4 of the way into the cake ball. Place the cake ball on the parchment-lined baking sheet and repeat until all cake balls are formed. This part can get quite messy so I kept a damp paper towel nearby for my fingers so I didn’t get cake all over the pop sticks. Put the cake balls in the fridge again until they are cold.
4. Take the cake balls out of the fridge and place them in your workspace. To minimize the possibility of cracking you can let them warm up a bit. If you are using sprinkles, put them in bowls within reach. In a microwave safe bowl, melt the chocolate/candy melts, starting with one minute and stirring and then in 30 second intervals with stirring in-between to allow for even melting. All of the websites I visited during my cake pop research warned not to overheat the coating as this would cause it to seize up and they suggested if this happens to add a small amount of shortening to the mixture. Water will also seize it up so keep your equipment that touches the candy melts dry.
5. Take your first cake ball and reshape it with your fingers – they may have gotten a little flattened from being on the baking sheet. (Again I had a damp paper towel nearby for my messy fingers.) Then dip in the candy melts. If it helps, use a spoon to spoon the melted coating over the bottom of the cake pop and then dip. Gently swirl the pop in the melted mixture and lift the pop up as you swirl. Keep swirling gently until the pop is out of the coating. If the coating is thick, you may need to swirl quickly so it doesn’t build up too thickly on the pop.
6. Use your fingers to sprinkle your sprinkles on the still wet candy melt coating. Bigger sprinkles (bats, eyeballs, bones) may need to be strategically placed on the pop. Smaller sprinkles (non-pareils, jimmies) can be sprinkled on.
7. Insert your cake pop, stick down, into the styrofoam block to dry. Repeat these steps for each cake pop.
Cake pops can be kept in the freezer but my fellow cake pop bloggers write that they cannot be refrigerated due to condensation buildup on the pops.
